Introduction to Halloween Eyeball Cake Pops
If you’re looking to add some spooky fun to your Halloween festivities, Halloween Eyeball Cake Pops are a must-have treat that’ll delight your guests (and their taste buds)! These whimsical dessert bites not only look ghoulishly good, but they’re incredibly easy to make. With their vibrant colors and eerie designs, they’ll be the highlight of any Halloween party, making them an ideal option for both seasoned bakers and those new to the kitchen.
Why Halloween Eyeball Cake Pops are a Must-Have Treat
First off, can we talk about how adorable yet creepy these cake pops are? When you display them at your party, they’ll instantly become a conversation starter. Plus, you can customize them to fit your theme! Think of all the creative options—different eye colors, varied icing designs, and even the inclusion of edible glitter for that extra spooky sparkle!
From a practical standpoint, cake pops are also incredibly versatile. With a base made from chocolate cake, they can easily accommodate various dietary preferences. You can choose to make them gluten-free or dairy-free, and swapping in Turkey Bacon or Chicken Ham for party platters adds another layer of creativity. Not to mention, they’re portion-controlled, meaning you can indulge without the guilt.
What’s even better? The process of making these delightful treats can be a fun activity for friends or family. Picture this: a cozy kitchen filled with laughter, playful arguments about who can create the creepiest eyeball, and the aroma of melting chocolate filling the air. It’s not just about the end product—it’s about creating memories.
Experts suggest incorporating seasonal ingredients to elevate your cake pops. For instance, using pumpkin-flavored cake or spices such as cinnamon and nutmeg could give your creations a unique twist and embrace the spirit of fall. You can find various tips on how to incorporate these flavors over at FoodNetwork, along with more Halloween-themed recipes.
So, gather your ingredients and let’s dive into this delightful adventure of crafting Halloween Eyeball Cake Pops!
Ingredients for Halloween Eyeball Cake Pops
Creating Halloween Eyeball Cake Pops is not only fun but also a fantastic way to get into the spooky spirit! Let’s dive into what you need to bring these creepy treats to life.
Essential Ingredients You’ll Need
To whip up a batch of these delightfully ghoulish cake pops, gather the following ingredients:
- Cake mix (any flavor you prefer)
- Eggs (usually 2–3 depending on the mix)
- Frosting (store-bought or homemade works great)
- White chocolate or candy coating (for that eerie outer shell)
- Candy eyeballs (available at most craft stores or online)
- Lollipop sticks (for holding your cake pops)
- Sprinkles (optional, but a fun addition!)
Optional Add-ins for Extra Flavor
Who wouldn’t want to elevate their Halloween Eyeball Cake Pops with something extra? Here are some optional ingredients you might consider:
- Flavor extracts (like vanilla or almond for a surprise taste)
- Turkey bacon bits (for a salty contrast—they might raise an eyebrow!)
- Nuts (if you enjoy the crunch)
- Food coloring (to add a wild twist to your frosting)
Feel free to mix and match these options to create your signature spooky treat! For additional Halloween baking tips, check out resources like Food Network for inspiration. Each ingredient adds a unique flair, making your cake pops not just a treat but an experience!
Step-by-Step Preparation of Halloween Eyeball Cake Pops
Halloween is the perfect time to let your creativity shine in the kitchen, and what better way to impress your friends than with Halloween Eyeball Cake Pops? These festive treats are not just spooky; they’re deliciously sweet, making them a hit for both kids and adults. Let’s walk through the steps to create these fun treats that will be the talk of your Halloween bash.
Bake the Cake
The first step is to bake your favorite cake flavor. Whether you go for classic vanilla, rich chocolate, or something more adventurous, the choice is yours! Preheat your oven to 350°F (175°C) and gather the following ingredients:
- 1 box of cake mix (any flavor you like)
- Eggs, water, and oil (per the box instructions)
Prepare your baking pan according to the package directions, pour in the batter, and bake as instructed. Don’t forget to check for doneness with a toothpick—the cake should spring back lightly when touched.
Crumble the Cake
Once your cake has cooled completely, it’s time to crumble it into fine pieces. Use your hands or a fork to break it apart in a large mixing bowl. This step is crucial as the cake needs to blend well with the frosting in the next step.
Mix the Cake with Frosting
Now comes the fun part: mixing your crumbled cake with frosting! Grab a tub of store-bought frosting—about one cup will do for an average-sized cake. The frosting acts as the glue that binds the cake together, so be generous and mix until everything is well combined. Don’t be afraid to use your hands; it’s the best way to achieve the right consistency.
Form the Cake Balls
Once your mixture is well-blended, scoop out small portions and roll them into balls. Aim for roughly one inch in diameter for each ball; this ensures even coating later on. Place these cake balls on a baking sheet lined with parchment paper.
Chill the Cake Balls
Refrigerate the formed cake balls for at least 30 minutes or until they are firm. Chilling them helps prevent breaks when you coat them later, so don’t skip this step!
Prepare the Candy Melts
While your cake balls are chilling, it’s time to melt your candy melts. You can choose spooky colors like green, purple, or blood-red to enhance the Halloween theme. Microwave according to the package instructions, stirring until they are smooth and liquefied. This will provide a fun and eerie coating for your Halloween Eyeball Cake Pops.
Insert Cake Pop Sticks
Once the cake balls are firm, take them out of the fridge. Dip the end of each cake pop stick in the melted candy and insert it into the center of each cake ball. This will help secure the stick and prevent the cake ball from falling off later.
Coat the Cake Pops
Now it’s time to coat your cake pops! Dip each ball into the melted candy, making sure it’s fully covered. Allow the excess to drip off—gently tap the stick against the side of the bowl if needed.
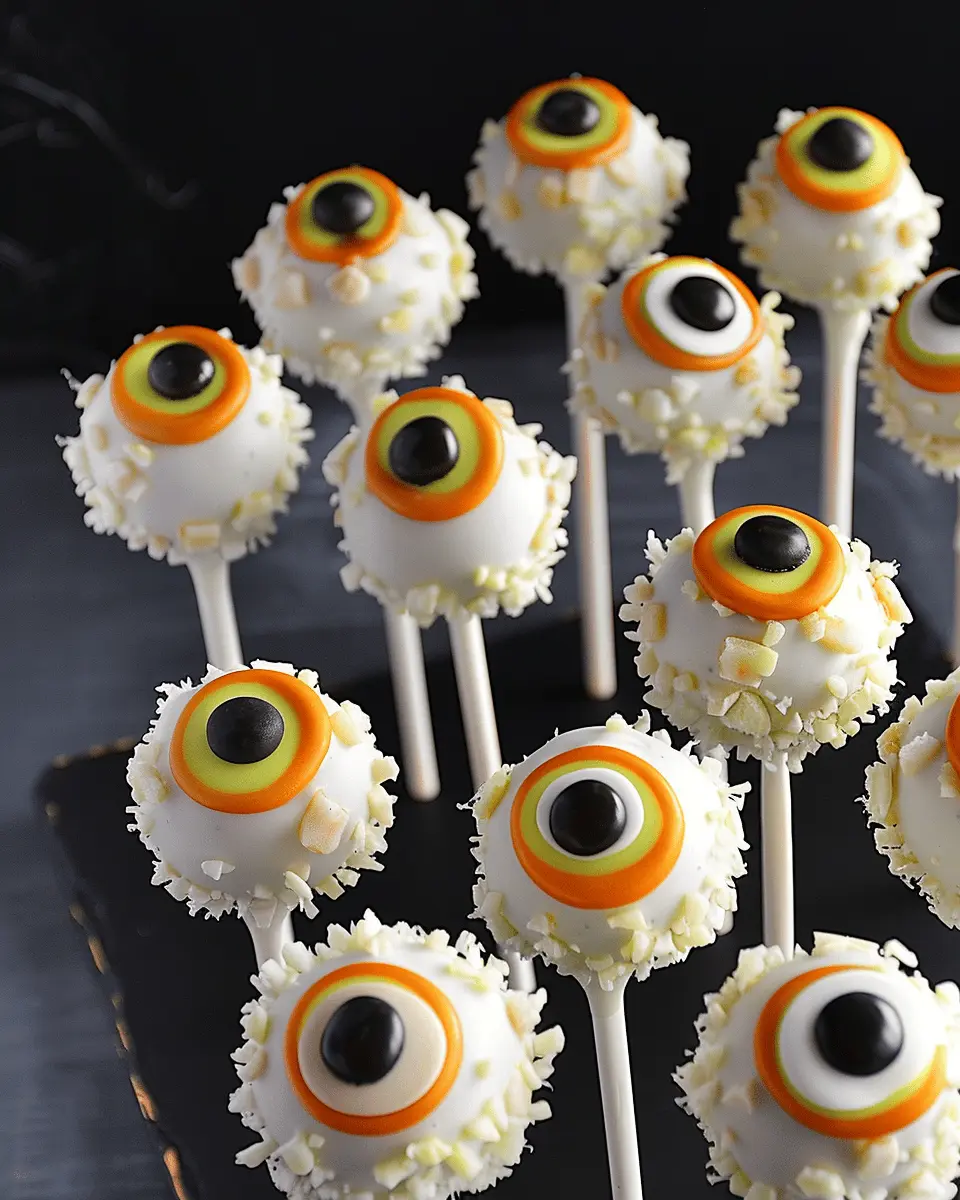
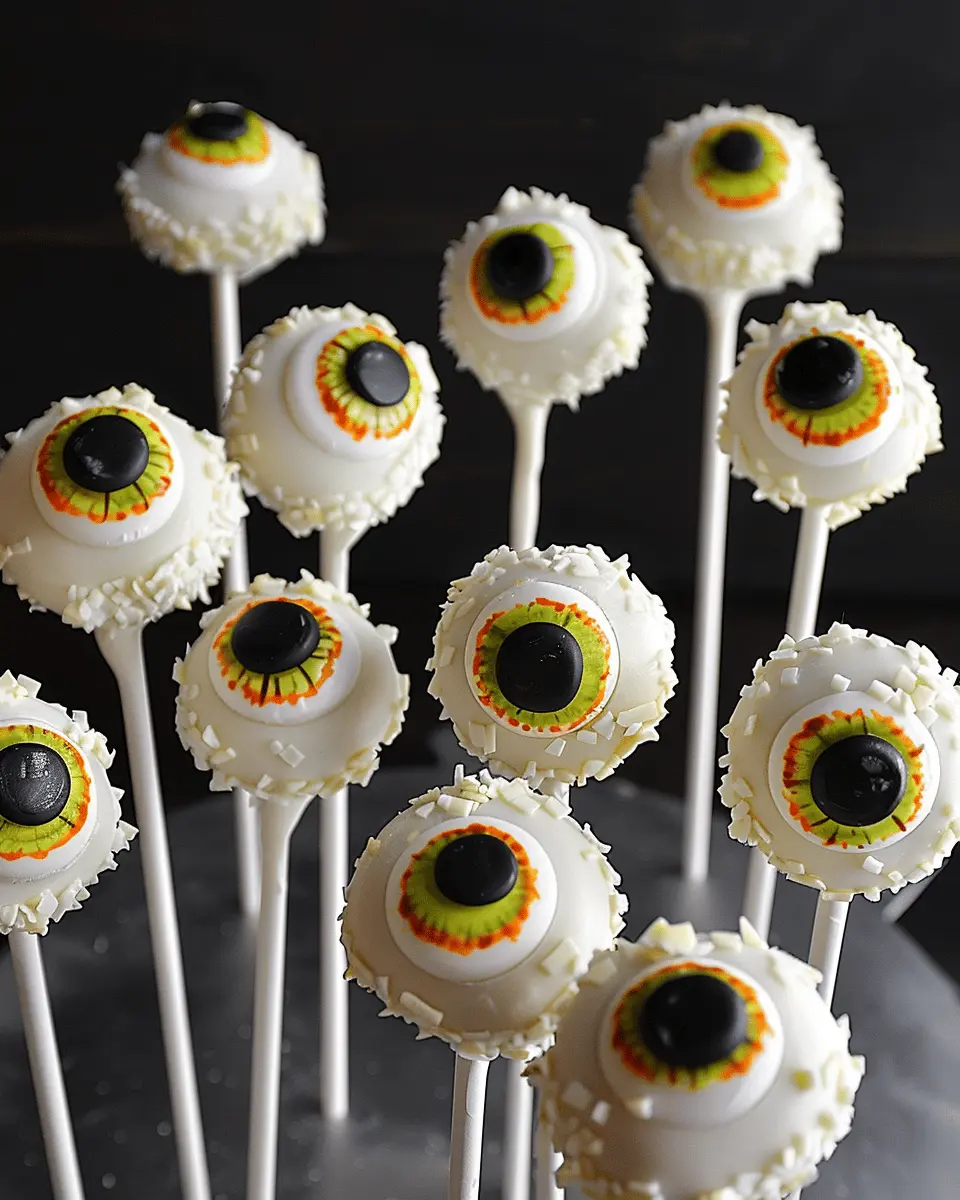
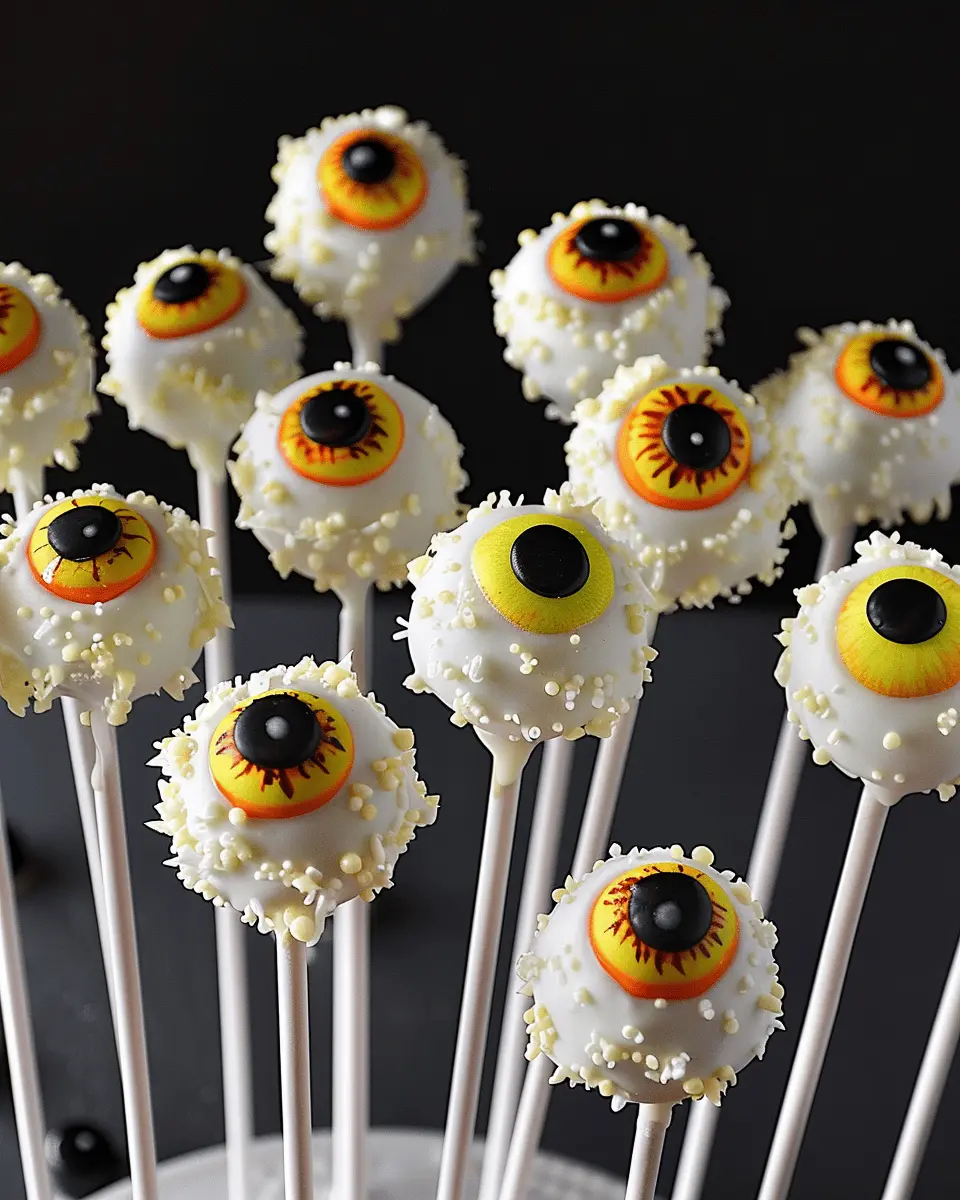
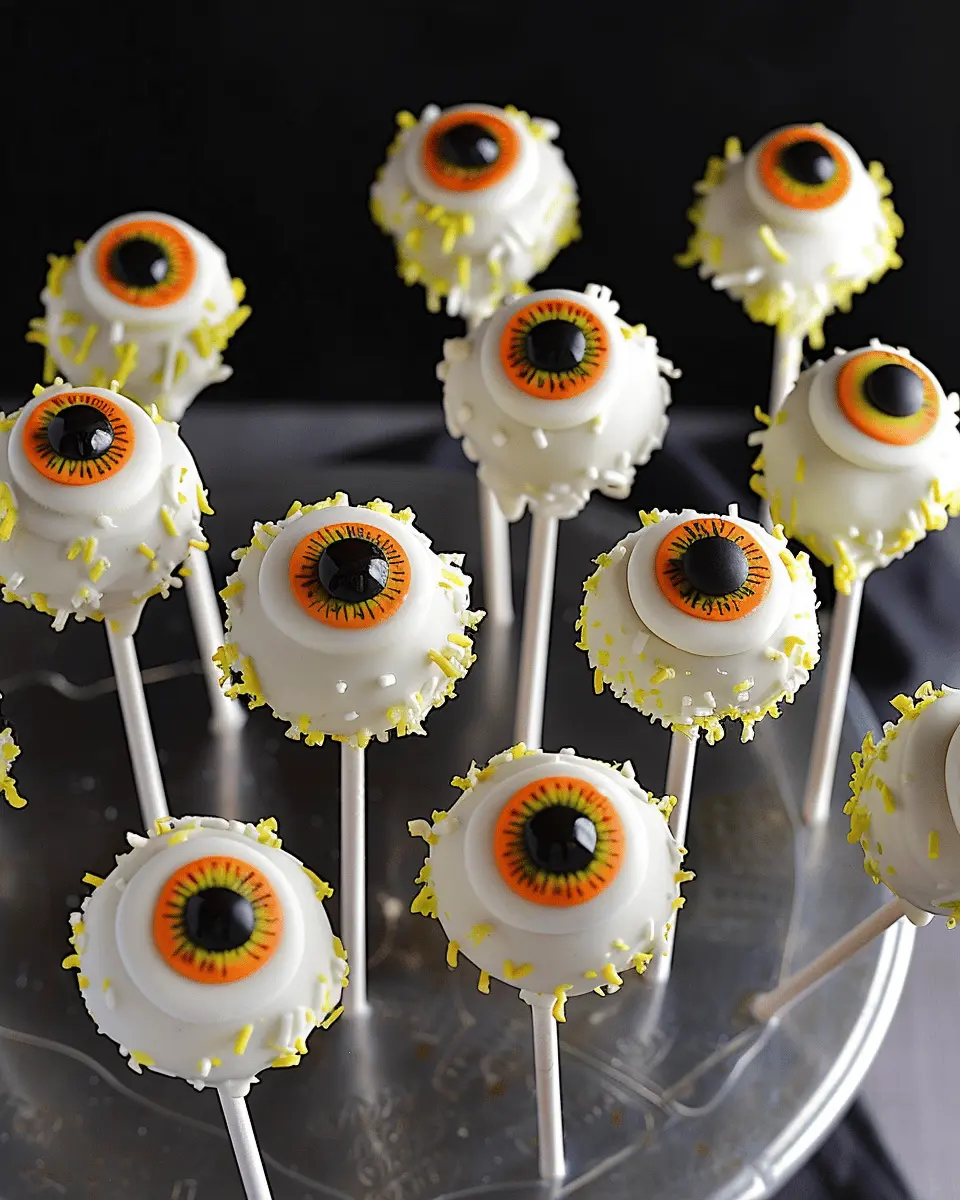
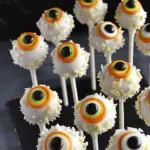
Create the Eyeballs
To make these cake pops look like creepy eyeballs, use melted white chocolate or candy melts to create a base layer. After that has set, add colored candy melts or frosting to create the iris and pupils. Let your imagination run wild; the more creative, the better!
Add the Veins
For an extra creepy touch, you can use a toothpick to drizzle some red candy melts to create bloodshot veins on your eyeballs. This gives your Halloween Eyeball Cake Pops that extra spooky flair!
Dry and Serve
Finally, place your cake pops upright in a foam block or a cake pop stand to let them dry completely. Once they’re set, display them on a festive platter and watch as your guests marvel at your culinary creation!
These Halloween Eyeball Cake Pops are sure to be a hit at your Halloween gathering or a fun treat to enjoy with friends. Give them a try and let the spooky celebrations begin! If you’re looking for more fun Halloween recipes, be sure to check out some of my favorites here. Happy baking!
Variations on Halloween Eyeball Cake Pops
Creating Halloween Eyeball Cake Pops can be a delightful adventure in flavor and creativity! Why settle for just one taste or look when you can customize them to fit your Halloween theme or personal preferences?
Different Flavors for Your Cake Mix
While vanilla and chocolate are classic choices, don’t be afraid to experiment! Consider these fun alternatives:
- Red Velvet: It adds a spooky twist with its deep red color. Just imagine it paired with cream cheese frosting!
- Lemon Cake: A zesty option that balances out the sweetness of the candy coating, making your cake pops refreshing.
- Spice Cake: Infused with cinnamon and nutmeg for a cozy fall flavor, they bring warmth to the Halloween festivities.
Use your favorite cake mix or make it from scratch; either way, the flavor can be tailored to impress your guests. Explore more flavor ideas at sites like Food Network or Serious Eats for inspiration.
Unique Decorations for Variations
The beauty of Halloween Eyeball Cake Pops lies in how you showcase them! Besides using colored melting chocolate for the eyeballs, think outside the box with these ideas:
- Candy Eyes: Instead of traditional icing, you can use candy eyes for a more lifelike appearance.
- Marble Effect: Mix colored candy melts together for a marbled look that will have everyone captivated.
- Sprinkles and Drizzles: Sprinkle edible glitter or set a drizzle of contrasting chocolate to enhance the eerie aesthetic.
With just a little creativity, you can transform standard cake pops into fun and terrifying treats that are sure to delight your friends and family this Halloween! Let your imagination run wild and enjoy the process—after all, Halloween is all about having fun!
Baking Tips and Notes for Halloween Eyeball Cake Pops
Ensuring a Perfect Consistency
To create the spooktacular Halloween Eyeball Cake Pops, achieving the right cake ball consistency is crucial. Start with moist cake, crumbling it finely to prevent lumps. A key tip is to use frosting sparingly—just enough to bind the cake without making it mushy. Aim for a dough-like texture that holds its shape when rolled into balls. If you find the mixture too sticky, a sprinkle of crushed cookies can help.
Tricks for Melting Candy Melts Smoothly
Melting candy melts for your cake pops can be tricky, but the right technique makes all the difference. First, chop the candy melts into small, even pieces to ensure they melt uniformly. Use a microwave-safe bowl and heat in 30-second intervals, stirring frequently. This prevents overheating and burning. If your melts are too thick, adding a teaspoon of vegetable oil or paramount crystals will help achieve a smoother, more pourable consistency. For an additional guide, check out this candy melting tutorial.
Serving Suggestions for Halloween Eyeball Cake Pops
Eye-Catching Presentation Ideas
When it comes to your Halloween Eyeball Cake Pops, presentation is everything! Try using clear treat bags tied with spooky ribbons to give each pop an air of mystery. Alternatively, place them in a decorative pumpkin or a cauldron filled with edible “monster grass” (think green shredded coconut). To make them even more festive, you can add labels or tags with fun Halloween sayings like “Eye See You!” This not only elevates your presentation but also sparks conversations among guests!
Pairing with Other Halloween Treats
Why stop at just cake pops? These eerie delights pair wonderfully with a variety of other Halloween treats. Consider serving them alongside ghost-shaped marshmallows or pumpkin-flavored cupcakes. For a bit of crunch, include some caramel popcorn or create a mini charcuterie board featuring fall favorites like pumpkin seeds and turkey bacon bites. Not to mention, a festive punch or a creamy apple cider can be perfect for washing down that sweet and spooky goodness.
Incorporating these serving suggestions not only amplifies the fun but also makes your Halloween gathering all the more memorable! For more fun ideas, visit resources like Food Network or AllRecipes.
Time Breakdown for Halloween Eyeball Cake Pops
When it comes to crafting those spooky yet delicious Halloween Eyeball Cake Pops, understanding the time commitment is essential. Here’s a handy breakdown to help you plan your baking session like a pro:
Preparation Time
Start with about 30 minutes of hands-on time to prepare your cake mixture. This includes mixing your ingredients, baking, and letting the cake cool. Feel free to experiment with flavors! If you’re wondering how long to bake a traditional cake, you usually need around 25-30 minutes; check out this baking guide for tips.
Chill Time
After your cake pops are formed, you’ll want to chill them for about 1 hour. This step is crucial to ensure they hold their shape while you dip them in chocolate.
Total Time
In total, you’re looking at around 2 hours, including preparation, chilling, and decorating. So, gather your friends and make a fun afternoon of it! The end result—the whimsical Halloween Eyeball Cake Pops—is totally worth the effort. Who wouldn’t want to bite into a spooky treat?
By breaking it down like this, you’ll find that making Halloween Eyeball Cake Pops can be a fun and relatively quick process. Happy baking!
Nutritional Facts for Halloween Eyeball Cake Pops
Calories Per Cake Pop
When diving into the world of spooky treats, it’s good to know what you’re munching on! Each Halloween Eyeball Cake Pop contains approximately 150 calories. This makes them a fun yet mindful treat to enjoy during the Halloween festivities. Just a couple can satisfy your sweet tooth without derailing your healthier eating goals.
Other Nutritional Information
Beyond calories, let’s take a closer look at the nutritional content of your Halloween Eyeball Cake Pops. Here’s a breakdown:
- Fat: Around 7 grams (mainly from the chocolate coating)
- Carbohydrates: Approximately 20 grams (from the cake and any added sugars)
- Protein: About 2 grams (thanks to the cake base)
- Fiber: Roughly 1 gram (a small dose, depending on your cake mix)
These cake pops are best enjoyed in moderation, but they’re a delightful twist perfect for a seasonal celebration! For more healthy Halloween alternatives, check out sources like Healthline for inspiration.
FAQs About Halloween Eyeball Cake Pops
Can I Make These Cake Pops Ahead of Time?
Absolutely! Making Halloween Eyeball Cake Pops ahead of time is a great way to save yourself some stress as the spooky season approaches. You can prepare the cake pops and freeze them before coating with chocolate. Just make sure to wrap them tightly in plastic wrap and store them in an airtight container. When you’re ready to serve, simply let them thaw at room temperature and dip in chocolate. This way, you’ll have delicious treats on hand for any impromptu gatherings or trick-or-treaters!
What Can I Use Instead of Cake Mix?
If you prefer a more homemade approach or need to cater to dietary restrictions, you can certainly make your cake from scratch. A simple vanilla or chocolate cake recipe works wonders for Halloween Eyeball Cake Pops. Alternatively, if you’re looking for something a little healthier or specific to a diet, consider using gluten-free flour or even black bean brownies for a unique twist. Many food blogs offer a variety of cake options that would work perfectly, like this gluten-free chocolate cake recipe for inspiration.
How Do I Store Leftover Cake Pops?
To keep your leftover Halloween Eyeball Cake Pops fresh, store them in the refrigerator in an airtight container. They typically last about a week, though they’ll likely be devoured long before then! If you want to extend their shelf life, you can freeze them as well. Simply wrap each pop individually in plastic wrap and place them in a freezer-safe bag. When you’re ready to enjoy them again, just take out as many as you like, let them thaw, and voilà—you’re back in spooky business!
Feel free to explore more tips about cake pop creation on reputable baking sites for expert advice!
Conclusion on Halloween Eyeball Cake Pops
Final Thoughts and Encouragement to Get Creative
As we wrap up our journey into the world of Halloween Eyeball Cake Pops, remember that these treats are not just about taste—they’re also an invitation to explore your creativity. Whether you opt for vibrant colors or unique flavor combinations, the only limit is your imagination. Invite friends over for a decorating party, and let everyone express their artistic flair.
Don’t hesitate to experiment with different cake flavors or coatings. A quick search on sites like The Spruce Eats can give you endless inspiration. Have fun, and make this Halloween memorable with your very own spooky creations!
PrintHalloween Eyeball Cake Pops: Spooktacular and Easy Treats
Get ready for a spooky and fun treat that’s perfect for Halloween celebrations! These Halloween Eyeball Cake Pops are a creative way to celebrate the holiday with deliciousness.
- Prep Time: 20 minutes
- Cook Time: 30 minutes
- Total Time: 1 hour
- Yield: 20 cake pops 1x
- Category: Dessert
- Method: Baking and Decorating
- Cuisine: American
- Diet: Vegetarian
Ingredients
- 1 box cake mix
- 1 jar frosting
- 1 package candy melts
- 20 cake pop sticks
- 1 pack edible eyes
- sprinkles (optional)
Instructions
- Prepare the cake mix according to package instructions and bake.
- Once the cake is cooled, crumble it into a bowl and mix with frosting until well combined.
- Form the mixture into balls and place them on a baking sheet.
- Chill the cake balls in the fridge for about 30 minutes.
- Melt the candy melts according to package instructions.
- Dip the end of each cake pop stick into the melted candy and insert it into a cake ball.
- Coat each cake pop in melted candy melts, then add edible eyes and sprinkles if desired.
- Allow the cake pops to set before serving.
Notes
- For a fun twist, you can use different colors of candy melts.
Nutrition
- Serving Size: 1 cake pop
- Calories: 150
- Sugar: 12g
- Sodium: 50mg
- Fat: 7g
- Saturated Fat: 4g
- Unsaturated Fat: 2g
- Trans Fat: 0g
- Carbohydrates: 20g
- Fiber: 1g
- Protein: 1g
- Cholesterol: 10mg
Keywords: Halloween Eyeball Cake Pops, Halloween treats, spooky recipes, cake pops