Introduction to Snowball Cake Recipe
What is a Snowball Cake and why you’ll love it?
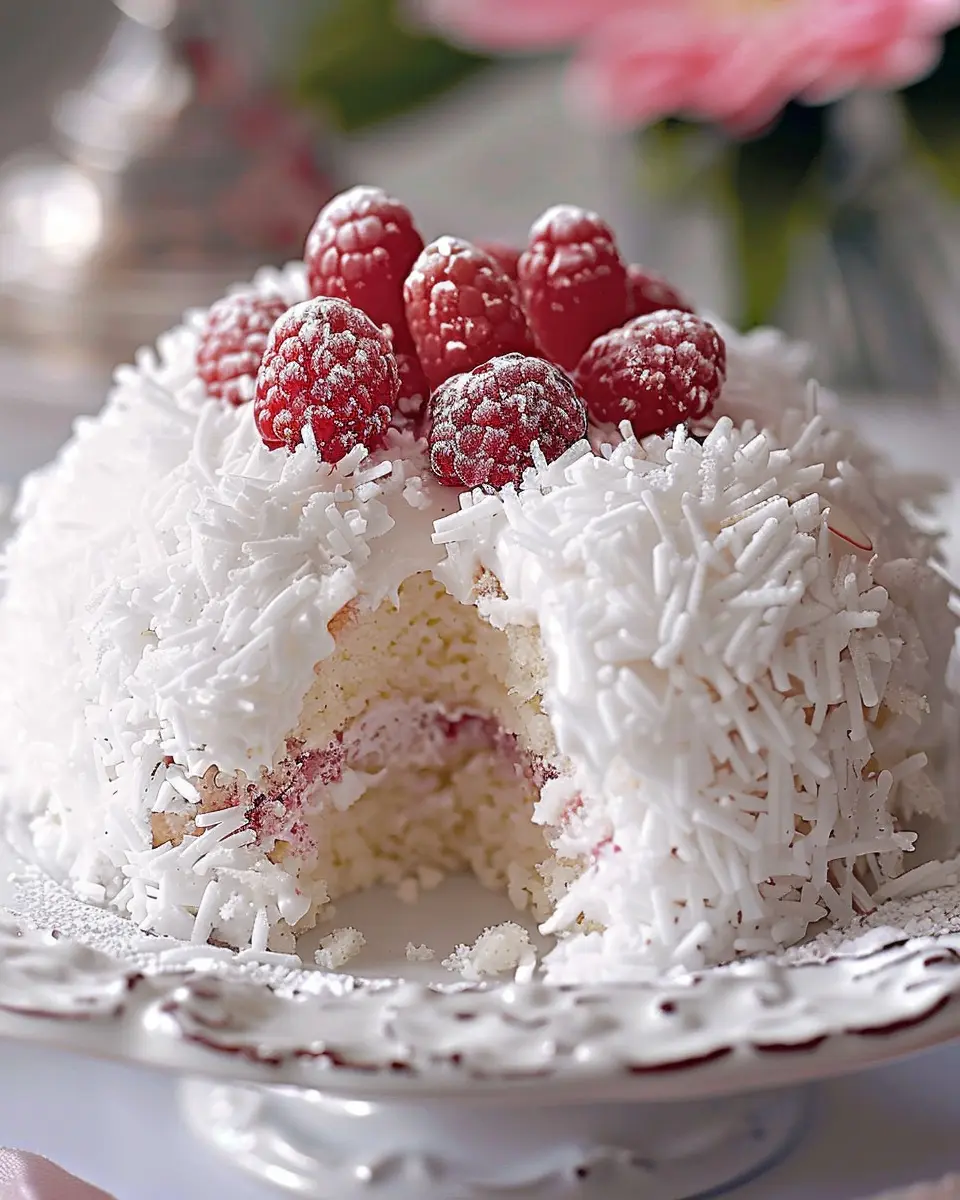
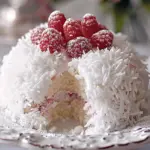
If you’re in the mood for a delightful dessert that’s both visually stunning and downright delicious, the Snowball Cake is your answer. Imagine layers of fluffy cake enveloped in a snow-white blanket of frosting and coconut, resembling a whimsical snowball—hence the name! This cake is a festive centerpiece that never fails to capture attention and satisfy sweet cravings.
The Snowball Cake recipe has a fantastic balance of textures and flavors. The soft and moist cake contrasts beautifully with the crunchy layers of shredded coconut, while a creamy frosting brings it all together. Whether you’re baking for a holiday, a birthday party, or just a casual get-together, this cake will undoubtedly impress.
You might be wondering: why should you whip up this delightful dessert? Here are a few reasons:
- Easy to Make: While it looks elaborate, the steps are straightforward, making it perfect for both novice and advanced bakers.
- Customizable: Love chocolate? You could easily swap in chocolate cake layers. Want to add a fruity twist? Incorporate some zesty citrus flavors in the frosting.
- Memorable Presentation: The visual appeal of a Snowball Cake will have everyone reaching for their phones to snap a pic before diving into it.
Did you know that baking can be a great stress reliever? According to a study by the University of Sussex, baking is a fantastic way to boost your mood and enhance creativity. So, not only are you treating your taste buds, but you’re also nurturing your mental well-being.
Ready to dive into the world of snowy confections? This Snowball Cake recipe will guide you step-by-step to create a masterpiece that delights everyone from your partner to your coworkers. If you’re curious about the history behind this cake or need tips on decorations, I encourage you to check out resources like The Art of Baking for inspiration.
So, grab your apron, and let’s get baking! This delicious adventure awaits you!

Ingredients for Snowball Cake
Essential ingredients for a delicious base
Creating a mouthwatering Snowball Cake hinges on a few key ingredients that come together to form a delicious foundation. To start, you’ll need:
- Cake flour – This is crucial for a light, airy texture.
- Granulated sugar – Sweetness is essential, so don’t skimp!
- Eggs – They help bind everything and add richness.
- Unsalted butter – Adds moisture and flavor, making the cake decadent.
- Baking powder – This will help your cake rise perfectly.
- Salt – Just a pinch to balance the sweetness.
- Milk – This keeps your cake moist and adds richness.
Having quality ingredients can elevate your Snowball Cake Recipe significantly. So, opt for fresh eggs and high-quality butter whenever possible!
Optional ingredients for an elevated twist
Feeling adventurous? You can easily take your Snowball Cake up a notch with some optional ingredients. Consider adding:
- Cocoa powder – For a chocolatey surprise, swap out some flour.
- Vanilla or almond extract – A simple splash can enhance the flavor profile.
- Fresh fruit – Berries or citrus zest can bring a refreshing twist.
- Nuts – Chopped walnuts or almonds can add a delightful crunch.
These optional ingredients can tailor your Snowball Cake Recipe to your personal taste, making it uniquely yours!
For more baking tips and tricks, check out resources like King Arthur Baking or Food52 to inspire your next culinary adventure!
Step-by-Step Preparation of Snowball Cake
Creating a delightful Snowball Cake is a wonderful culinary journey, and with this guide, you’ll find the steps straightforward and enjoyable. Whether you’re baking for a special occasion or simply treating yourself, this guide will help you achieve cake perfection!
Gather and Prepare Your Ingredients
First things first: gather your ingredients. You’ll need:
- 2 cups all-purpose flour
- 1 ½ cups granulated sugar
- ½ cup unsalted butter, softened
- 1 cup buttermilk
- 3 large eggs
- 2 teaspoons vanilla extract
- 2 teaspoons baking powder
- 1 teaspoon baking soda
- ½ teaspoon salt
- ½ cup raspberry preserves
- Powdered sugar for dusting
Having everything ready will make the baking process smooth and efficient. The key is to measure accurately and set out your ingredients ahead of time to avoid any last-minute dashes to the grocery store. Speaking of preparation, if you want to learn more about baking essentials, check out this baking guide.
Prepare the Baking Pan
Next, let’s get our baking pan ready. You’ll need a 9×13-inch rectangle pan for this Snowball Cake recipe. Grease the pan with butter or non-stick spray and then line the bottom with parchment paper. This will ensure that your cake releases effortlessly after baking. No one likes a cake stuck in the pan!
Mix the Dry Ingredients
Now it’s time to combine your dry ingredients. In a medium bowl, whisk together the flour, baking powder, baking soda, and salt. Mixing the dry components separately helps to evenly distribute the leavening agents throughout the cake, ensuring a lovely rise.
Cream the Butter and Sugar
In your stand mixer or a large bowl, cream the butter and sugar together until it’s light and fluffy. This usually takes about 3-5 minutes. If you don’t have a mixer, a good whisk and some elbow grease will work, too! Remember, this step is crucial as it incorporates air into the batter, helping your cake achieve that soft texture.
Incorporate Eggs and Vanilla
Once your mixture is fluffy, add in the eggs one at a time, mixing well after each addition. Don’t forget to include the vanilla extract—it adds a lovely flavor that compliments the raspberries beautifully.
Alternate Wet and Dry Ingredients
With your wet and dry ingredients ready, it’s time for the fun part! Gradually add the flour mixture to the creamed butter and sugar, alternating with the buttermilk. Begin and end with the flour, mixing just until combined. Overmixing can lead to a dense cake, and we want that delightful fluffiness!
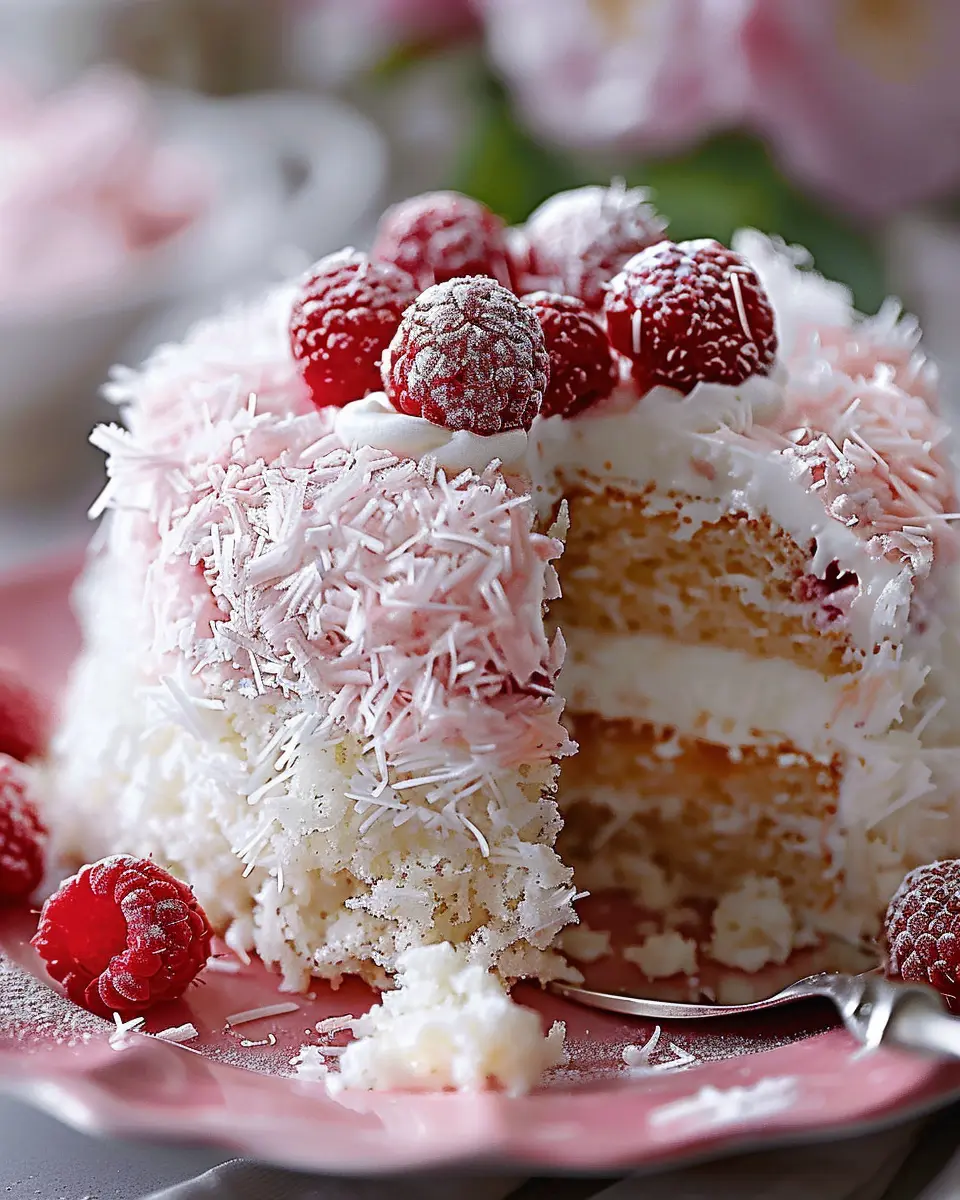
Add Raspberry Preserves and Swirl
Here’s where you introduce a delicious twist to your Snowball Cake. Gently fold in the raspberry preserves. Don’t be too vigorous; you want a marbled effect rather than fully mixing it in. The bursts of raspberry will create a beautiful and flavorful ribbon throughout the cake.
Bake the Cake to Perfection
Pour your batter into the prepared pan and smooth out the top. Bake in a preheated oven at 350°F (175°C) for about 30-35 minutes. The cake is done when a toothpick inserted in the center comes out clean. Your kitchen will smell heavenly, and you might find it hard to resist sneaking a bite!
Cooling and Coating the Cake
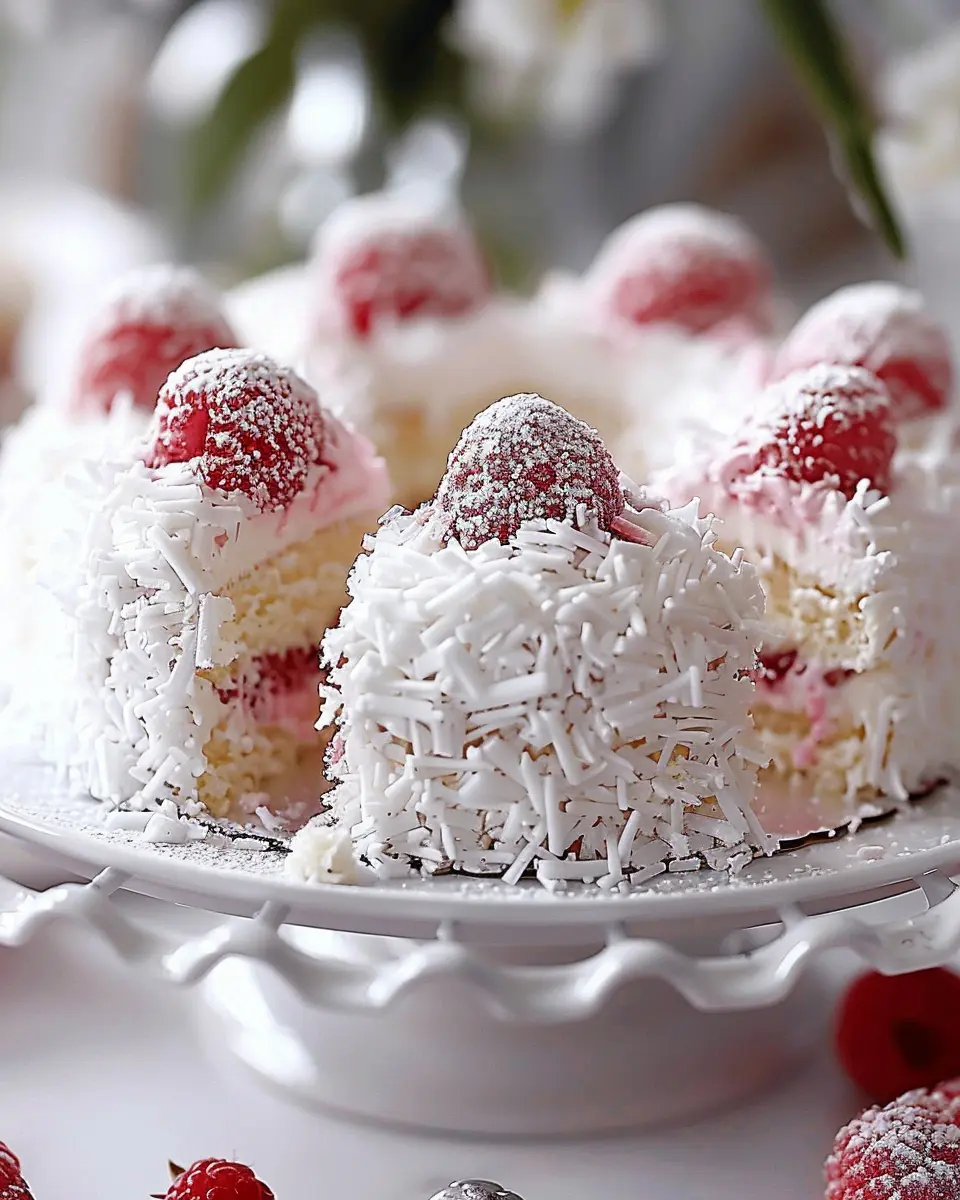
Once baked, let the cake cool in the pan for about 10 minutes before transferring it to a wire rack to cool completely. This step is vital as it allows the cake to set properly. Once cooled, dust with powdered sugar for that quintessential snowball look.
And there you have it—a beautifully crafted Snowball Cake! Enjoy it with family and friends, or savor it quietly with a cup of coffee while reflecting on your culinary triumph.
Variations on Snowball Cake
Snowball Cake is a delightful treat that can be customized to suit a variety of tastes and occasions. Why stick to the classic when you can explore exciting variations that will impress your friends and family? Here are some of my favorite twists on the traditional Snowball Cake Recipe.
Tropical Snowball: Using Lime or Pineapple Preserves
Dreaming of a tropical getaway? Bring the island vibes to your kitchen with a Tropical Snowball Cake! Instead of the standard frosting, use lime or pineapple preserves to give your cake a zesty, fruity flavor. This fresh twist not only adds a splash of color but also offers a refreshing contrast to the cake’s sweetness. Try pairing it with shaved coconut or toasted macadamia nuts for added texture. Imagine the sunshine on your face with each bite — it’s the perfect treat for summer gatherings or any time you want a taste of the tropics!
Mini Snowball Cakes: Perfect for Gatherings
Hosting a party? Mini Snowball Cakes are the way to go! These bite-sized wonders allow your guests to enjoy the beloved flavors of your Snowball Cake Recipe without the commitment of a full slice. Simply bake the cake in a muffin tin, then frost each one individually for a personal touch. They are not only adorable but also make for great party favors or dessert table decor. Plus, you can easily switch up the flavors for variety. Don’t forget to offer a few different toppings; think colorful sprinkles or a drizzle of chocolate. Your gatherings will never be the same!
For more ideas on cake variations, check out this guide from Epicurious for inspiration that suits your baking style!
Cooking Tips and Notes for Snowball Cake
Importance of Room Temperature Ingredients
Using room temperature ingredients is crucial for your Snowball Cake Recipe. When butter, eggs, and dairy products are at room temperature, they blend more effectively, leading to a fluffier texture. This simple step can elevate your cake’s rise and ensure even baking. Aim for about 30 minutes out of the fridge before mixing.
Tips for Achieving the Perfect Swirl
To achieve that stunning swirl, don’t just pour your batters haphazardly into the pan. Instead, spoon alternating blobs of each batter in a circular motion. Then, take a knife or skewer and gently swirl through the batter from the top to the bottom. This technique allows for a beautiful marbled effect without losing the structure of the cake.
Storage Tips for Freshness
Once your Snowball Cake has cooled, wrap it tightly in plastic wrap or store it in an airtight container. Storing it in a cool place helps maintain moisture, allowing you to enjoy maximum freshness for up to 3 days. For longer storage, consider freezing individual slices—perfect for a quick treat! For more storage tips, check out this helpful guide on Keeping Cakes Fresh.
Serving Suggestions for Snowball Cake
Pairing Ideas with Beverages
When it comes to enjoying your Snowball Cake, the right beverage can elevate the experience. For a delightful pairing, consider serving it with:
- Freshly brewed coffee: The rich flavor perfectly complements the lightness of the cake.
- Herbal tea: Chamomile or peppermint tea can offer a refreshing contrast.
- Sparkling water: Enhance your dessert without overpowering it; the bubbles provide a fun texture.
These combinations not only enjoy a harmonious taste but also allow you to cater to various preferences. Plus, they can make your dessert moments more special, whether it’s a cozy weekend or a festive gathering.
Creative Presentation Options
How you serve your Snowball Cake can add a touch of magic to your dessert. Here are some creative ideas:
- Layered display: Arrange slices on tiered cake stands for a visual feast.
- Accompaniments: Serve with fresh berries or a light drizzle of fruit coulis to add color and flavor.
- Individual servings: Use small mason jars to create individual portions, layering with whipped cream for a charming touch.
By thinking outside the box, your Snowball Cake Recipe will not just taste wonderful but look stunning as well. These presentation options are a great way to impress your guests—check out more ideas at Epicurious and Bon Appétit.
Time Breakdown for Snowball Cake
Understanding the time commitment for your Snowball Cake Recipe can make the baking experience smoother and more enjoyable. Here’s a quick breakdown to help you plan your baking session:
Preparation Time
Before diving into the oven, you’ll want to allocate about 20 minutes for preparation. This includes gathering your ingredients, setting up your baking space, and mixing your batter. Pro tip: Chop any ingredients like nuts or fruits beforehand to save time.
Baking Time
Once your batter is ready, it’s time for the magic! The baking process will take roughly 30 minutes. Keep a close eye on your cake during the last few minutes, as oven temperatures can vary.
Total Time
When you combine the preparation and baking phases, your total time investment comes to around 50 minutes. Quick and rewarding! If you’re interested in learning more about baking techniques, you might find resources from King Arthur Baking or Food52 helpful.
Now, armed with this timeline, you’re one step closer to creating a delightful Snowball Cake that’s sure to impress!
Nutritional Facts for Snowball Cake
When diving into the delightful world of a Snowball Cake Recipe, it’s essential to understand its nutritional profile. This way, you can enjoy every bite, guilt-free.
Calories
A typical serving of Snowball Cake contains around 350 calories. This makes it a smart choice for a dessert that satisfies your sweet tooth without going overboard.
Fat Content
You can expect about 15 grams of fat per slice. While this isn’t the lowest, pairing your cake with some fresh fruits can help balance it out beautifully.
Sugar Content
With approximately 25 grams of sugar, this cake definitely leans towards the sweet side. If you’re mindful of your sugar intake, consider tweaking the recipe by using natural sweeteners or enjoying smaller portions.
Remember, indulging in a Snowball Cake is all about enjoying the moment. For tips on healthier substitutions, check out sources like Healthline and Nutrition.gov to make your dessert experience even more enjoyable!
FAQ about Snowball Cake
Can I use frozen raspberries instead of preserves?
Absolutely! While fresh raspberries offer a delightful texture and flavor, using frozen raspberries can be a great alternative, especially if you’re in a pinch. Just remember to thaw and drain them first to avoid excess moisture in your Snowball Cake Recipe. This ensures that the cake remains fluffy and light.
How can I make this cake gluten-free?
Making a gluten-free Snowball Cake is easier than you might think! Swap out traditional all-purpose flour for a gluten-free blend, which you can find at most supermarkets or health food stores. Brands like Bob’s Red Mill offer excellent options that perform well in baking. Also, you might consider adding a teaspoon of xanthan gum to mimic the elasticity of gluten. As always, ensure all other ingredients are certified gluten-free, especially any baking powder or decorations you plan to use.
What’s the best way to store leftover cake?
To keep your Snowball Cake fresh, wrap it tightly in plastic wrap or store it in an airtight container. If you have layers with frosting, you might want to place a parchment paper separator between layers to prevent sticking. For maximum freshness, try to consume it within three days. If you anticipate having leftovers longer than that, freezing individual slices is an excellent option! Just thaw at room temperature when you’re ready to indulge again.
For more baking tips, you can learn about proper cake storage from sources like King Arthur Baking. Enjoy your Snowball Cake!
Conclusion on the Snowball Cake Recipe
Making homemade desserts like the Snowball Cake is an experience that brings joy and satisfaction. There’s something truly special about creating a delicious treat from scratch, infusing your kitchen with delightful aromas. This recipe is not just about the final product—it’s about the memories you make while preparing it.
As you gather your ingredients and whisk, you are crafting more than just a cake; you’re making moments to share with friends and family. So, embrace your inner baker and give this Snowball Cake Recipe a try! You might discover a new favorite to add to your dessert repertoire.
For more baking inspiration, check out Baker’s Illustrated or Food Network.
PrintSnowball Cake Recipe: A Delightfully Easy Treat for All Occasions
Enjoy this easy and delightful Snowball Cake recipe, perfect for any occasion!
- Prep Time: 15 minutes
- Cook Time: 35 minutes
- Total Time: 50 minutes
- Yield: 8 servings 1x
- Category: Dessert
- Method: Baking
- Cuisine: American
- Diet: Vegetarian
Ingredients
- 2 cups all-purpose flour
- 1 cup sugar
- 1 cup unsalted butter
- 4 large eggs
- 1 teaspoon vanilla extract
- 1 teaspoon baking powder
- 1/2 teaspoon salt
- 2 cups shredded coconut
Instructions
- Preheat the oven to 350°F (175°C).
- In a bowl, cream together the butter and sugar until fluffy.
- Add eggs one at a time, mixing well after each addition.
- Stir in vanilla extract.
- In another bowl, whisk together flour, baking powder, and salt.
- Gradually add the dry ingredients to the wet mixture.
- Fold in shredded coconut.
- Pour the batter into a greased cake pan.
- Bake for 30-35 minutes or until a toothpick comes out clean.
- Let it cool before serving.
Notes
- For best results, use room temperature ingredients.
- This cake can be decorated with additional coconut on top.
Nutrition
- Serving Size: 1 slice
- Calories: 350
- Sugar: 20g
- Sodium: 200mg
- Fat: 18g
- Saturated Fat: 12g
- Unsaturated Fat: 4g
- Trans Fat: 0g
- Carbohydrates: 45g
- Fiber: 2g
- Protein: 4g
- Cholesterol: 80mg
Keywords: Snowball Cake, Easy Dessert, Coconut Cake