
Introduction to Sweetened Condensed Milk Snowballs
What are Sweetened Condensed Milk Snowballs?
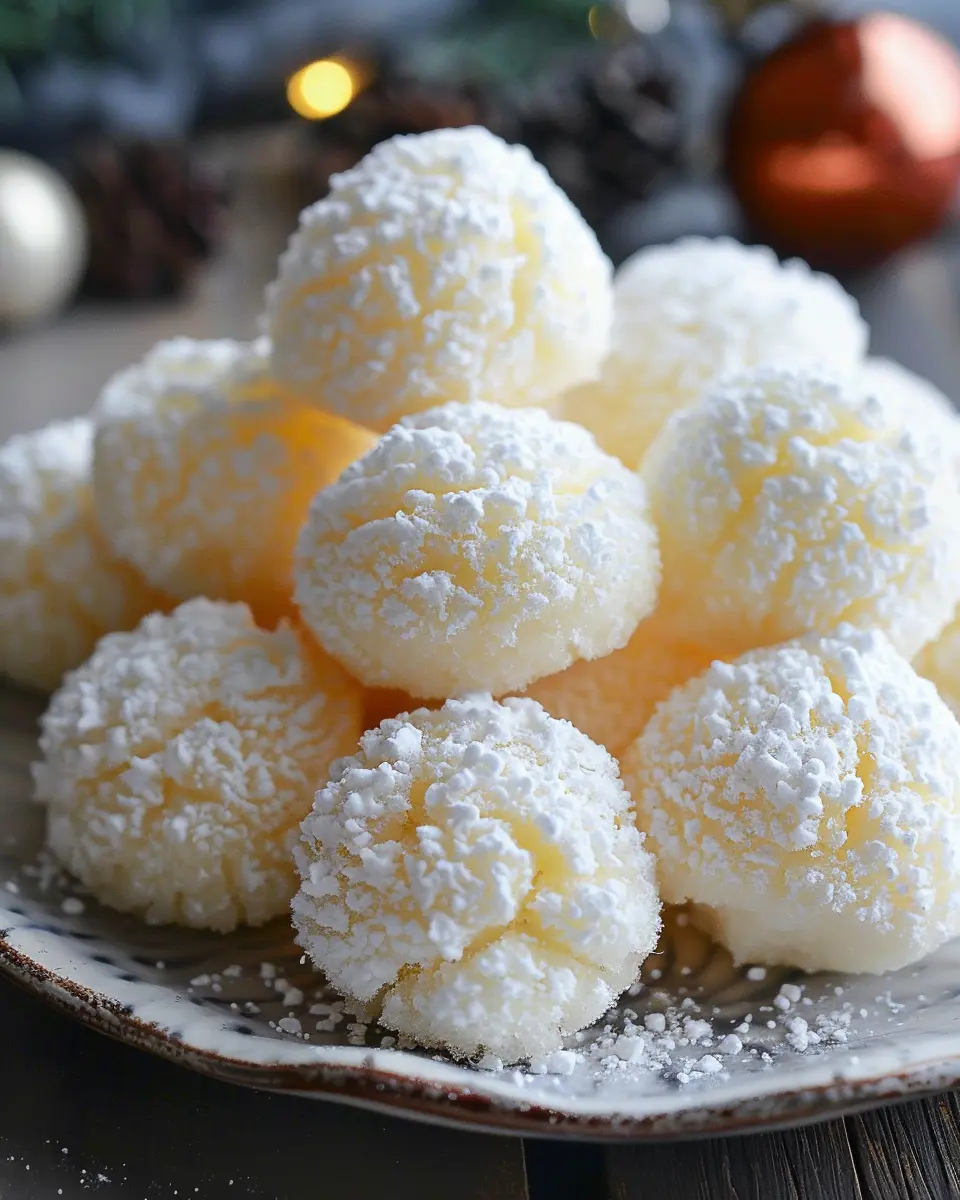
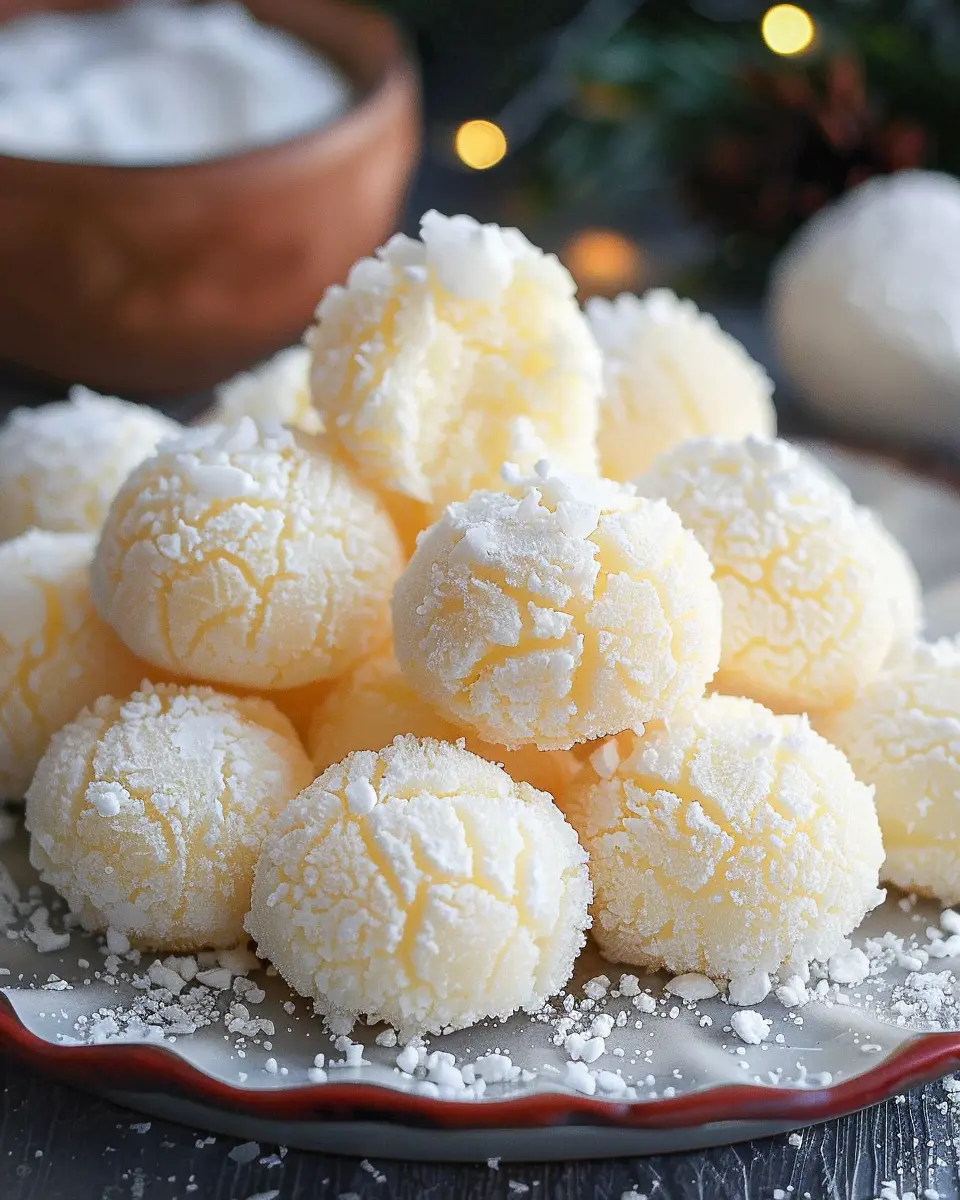
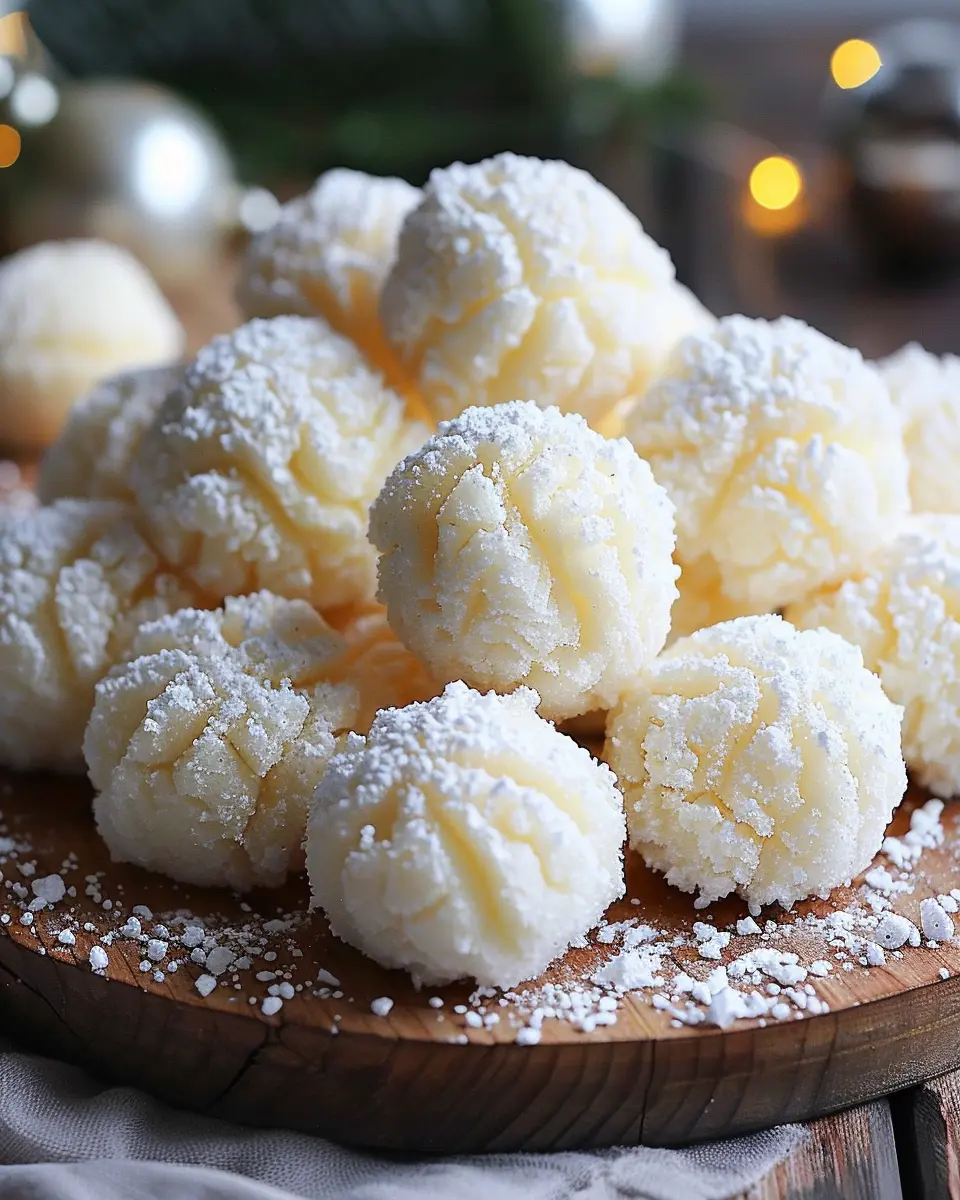
Sweetened condensed milk snowballs are delightful, bite-sized treats that combine the creaminess of sweetened condensed milk with the fluffiness of shredded coconut. These little spheres of joy are often rolled in more coconut or even crushed nuts, giving them a delightful texture and flavor. The beauty of these snowballs lies in their simplicity—made with just a few ingredients, they come together effortlessly and are perfect for any occasion.
When you take a bite, you’ll experience a creamy burst, followed by the satisfying chewiness of coconut. They celebrate the joy of sweet treats without requiring baking skills, making them ideal for anyone looking to whip up something special at home. If you’re curious about how easy they are to prepare, check out some other no-bake recipes for inspiration!
Why You Should Make Them at Home
Making sweetened condensed milk snowballs at home is not only fun but rewarding too. Here are a few reasons why you should consider giving them a try:
-
Quick and Easy: With minimal prep time and a straightforward process, these treats can be ready in under an hour. Whether you have unexpected guests or want to treat yourself, they are a perfect choice.
-
Customizable: You can experiment with different flavors and coatings. Want to add a dash of vanilla or a sprinkle of cocoa powder? Go for it! The same goes for rolling them in nuts, sprinkles, or even crushed cookies to give them a unique twist.
-
Budget-Friendly: With just a few pantry staples like sweetened condensed milk, shredded coconut, and perhaps some chocolate, you can indulge in a satisfying treat without breaking the bank.
-
Perfect for Entertaining: Hosting a gathering? These snowballs will impress your friends and family, making for delightful conversation starters. You can even package them as gifts—just imagine receiving a box of these sweet delights!
As you can see, sweetened condensed milk snowballs are more than just a treat; they’re a celebration of creativity and simplicity. So why not give them a try? They might just become your new favorite dessert! For more creative ideas, visit resources like Epicurious for additional recipes that make the most of condensed milk.
Let’s dive into the recipe!
Ingredients for Sweetened Condensed Milk Snowballs
When it comes to crafting delightful sweetened condensed milk snowballs, the ingredients you choose make all the difference. Let’s dive into what you’ll need to create these delectable treats.
Essential ingredients
To whip up your batch of snowballs, gather the following essentials:
- Sweetened condensed milk: This is the star of the show, providing that rich sweetness and creamy texture.
- Unsweetened shredded coconut: It not only adds a delightful chewiness but also enhances that snowball effect.
- Vanilla extract: Just a splash for flavor depth—it makes a world of difference!
- Powdered sugar: This keeps everything sweet and gives your snowballs the perfect finish.
- Almond flour: Alternatively, you can use all-purpose flour for a different texture.
Optional mix-ins
Feel free to get creative! Here are some optional mix-ins to elevate your sweetened condensed milk snowballs:
- Chopped nuts: Almonds or walnuts can add a delightful crunch.
- Chocolate chips: For a decadent twist, mini chocolate chips blend beautifully.
- Dried fruits: Think raisins or cranberries to add a chewy, fruity component.
- Spices: A dash of cinnamon or nutmeg can introduce a warm, cozy flavor profile.
Remember, the beauty of these sweetened condense milk snowballs is their versatility. Each ingredient can be tailored to your taste preferences, making every batch uniquely yours. For tips on ingredient substitutions or variations, visit AllRecipes or check out Food Network for extra inspiration!
Preparing Sweetened Condensed Milk Snowballs
Making sweetened condensed milk snowballs is not just a delightful culinary adventure; it’s also a great way to connect with friends and family over the holiday season or any special occasion. The cookies are soft, buttery, and incredibly versatile, making them a perfect base for creativity in the kitchen. Let’s dive into the easy steps for preparing these delicious treats!
Gather Your Ingredients
Before you hit that mixing bowl, gather all the necessary ingredients to ensure a smooth baking experience. Here’s what you’ll need:
- 1 cup of unsalted butter (softened)
- 1 can (14 ounces) of sweetened condensed milk
- 3 cups of all-purpose flour
- 1 teaspoon of baking soda
- 1 teaspoon of vanilla extract
- 1 cup of chopped nuts (like walnuts or pecans, optional)
- A generous sprinkle of confectioners’ sugar for dusting
Having everything on hand not only saves you time but also reduces the likelihood of missing key elements. Trust me, there’s nothing more frustrating than realizing you’re out of butter halfway through a recipe!
Cream the Butter
In a large mixing bowl, start by creaming together your softened butter and confectioners’ sugar until the mixture becomes fluffy. This process is critical because it incorporates air into the mixture, leading to those light, airy sweetened condensed milk snowballs that will practically melt in your mouth. Use an electric mixer on medium speed—this will save you a lot of elbow grease!
Mix in the Sweetened Condensed Milk
Now it’s time to introduce the star ingredient: the sweetened condensed milk. Pour the entire can into your creamed mixture, adding in the vanilla extract as well. The sweetened condensed milk not only adds moisture and sweetness but also gives these cookies their unique texture. Mix everything until well combined; you want it to become a smooth batter. This is also the perfect moment to add your optional nuts if you like a crunchy texture contrast.
Combine Dry Ingredients
In a separate bowl, whisk together your all-purpose flour and baking soda. It’s crucial to make sure these dry ingredients are well-blended before adding them to your wet mixture. This step ensures that your sweetened condensed milk snowballs rise evenly as they bake. Gradually add the dry mixture to the wet ingredients, mixing gently until it forms a cohesive dough.
Shape the Cookies
Your cookie dough should be pliable but not too sticky. Now, it’s time to shape your snowballs! Scoop about a tablespoon of dough and roll it between your palms to create little balls. Aim for a size that’s just right for a bite or two. Place the balls onto a baking sheet lined with parchment paper, making sure to leave enough space between each one since they will spread out a bit while baking.
Bake the Snowballs
Preheat your oven to 350°F (175°C). Bake the snowballs for about 12-15 minutes or until they are lightly golden at the edges. Keep an eye on them because every oven is different. You want them soft but firm enough that they won’t fall apart when you dust them with sugar later.
Dust with Confectioners’ Sugar
Once your sweetened condensed milk snowballs have cooled for a few minutes on the baking sheet, it’s time for the finishing touch! Generously dust each cookie with confectioners’ sugar. This not only adds a lovely snowy aesthetic but also brings that delightful sweetness to each bite.
And there you have it! A straightforward, enjoyable process that results in the most delectable sweetened condensed milk snowballs. Perfect for sharing, serving at parties, or enjoying with a hot cup of tea or coffee. Happy baking! If you’re looking for more recipes or tips, check out Taste of Home for inspiration!
Variations on Sweetened Condensed Milk Snowballs
Sweetened condensed milk snowballs are a delightful treat that can be easily customized to suit your taste. Here are some fun variations to get your creativity flowing!
Indulgent Chocolate Chip Snowballs
If you have a sweet tooth, these chocolate chip snowballs will steal your heart! Simply fold mini chocolate chips into the sweetened condensed milk mixture before shaping them into balls. The melty chocolate offers a rich contrast to the sweetness, making each bite oh-so-satisfying. For an extra touch, roll the finished snowballs in powdered sugar or cocoa powder for that snowy effect.
Nutty Snowballs with Almonds or Pecans
Looking for a nutty twist? Add finely chopped almonds or pecans to your sweetened condensed milk snowballs for a crunchy texture and nutty flavor. The nuts bring a wholesome element to your treat, enhancing both taste and nutrition. You can even toast them lightly before adding them to your mixture to boost their flavor. This variation pairs wonderfully with a cup of coffee or tea and makes for a great afternoon pick-me-up!
Fruity Snowballs with Cranberries
For a refreshing change, consider fruity sweetened condensed milk snowballs featuring dried cranberries. The tartness of the cranberries balances the rich sweetness of the milk, offering a burst of flavor in every bite. To enhance the experience, you can also include a hint of orange zest to elevate the fruitiness. Roll these beauties in shredded coconut for a tropical vibe!
These variations not only add different flavors and textures to your snowballs but also make your dessert table more exciting. So, which one will you try first?
Cooking Tips and Notes for Sweetened Condensed Milk Snowballs
Tips for Achieving Perfect Texture
To bake sweetened condensed milk snowballs that are light and airy, technique is everything. Here are a few helpful hints:
- Use room temperature ingredients: Room temperature butter and eggs incorporate better, leading to a fluffier texture.
- Don’t overmix: After adding flour, mix just until combined. Overmixing can lead to dense treats.
- Chill the dough: Allowing your dough to rest in the fridge for about 30 minutes can help the flavors meld and result in a softer bite.
Common Mistakes to Avoid
To elevate your sweetened condensed milk snowballs, steer clear of these common pitfalls:
- Skipping the sifting step: Not sifting your flour can lead to clumps, creating uneven textures. Extra steps matter!
- Not adjusting baking time: Ovens vary; keep an eye on your snowballs. They’re done when the edges are golden brown.
- Using outdated baking powder: Always check the expiration date. Fresh ingredients mean better results!
For more detailed baking techniques, you can visit reputable sources like King Arthur Baking or check out some baking science on Serious Eats. Happy baking!
Serving suggestions for Sweetened Condensed Milk Snowballs
Pairing with beverages
When it comes to delighting your taste buds, the fun doesn’t stop at the sweetened condensed milk snowballs! These treats pair beautifully with a variety of beverages. Consider serving them with:
- Creamy Coffees: A rich café latte or a mocha can complement the sweetness of the snowballs perfectly.
- Iced Teas: Why not brew some chamomile or hibiscus iced tea? The floral notes will elevate the flavors of your snowballs.
- Smoothies: Try a tropical fruit smoothie—with hints of banana, mango, or pineapple—for a refreshing contrast to the snowballs’ richness.
Presentation ideas for gatherings
Make your sweetened condensed milk snowballs the star of your dessert table with a few simple presentation tips:
- Platter Display: Arrange the snowballs in a decorative way on a beautiful platter. You could even dust them with shredded coconut or powdered sugar for a fun finish.
- Individual Cups: Serve them in small, clear cups for an elegant touch. This not only looks chic but also allows guests to grab and go.
- Themed Decorations: Customize the decor based on the occasion, whether it’s a festive holiday gathering or a casual summer barbecue.
With these pairing and presentation ideas, your sweetened condensed milk snowballs are sure to impress! For more delightful dessert inspiration, check out this article on dessert pairings.
Time breakdown for Sweetened Condensed Milk Snowballs
Preparation time
Getting started on your sweetened condensed milk snowballs is quick and easy! You’ll need about 15 minutes for preparation. This includes gathering your ingredients and mixing everything together. Make sure to have your kitchen tools ready—trust me, it makes the process smoother.
Baking time
Once your snowballs are formed, they’ll need 10-15 minutes in the oven. Keep an eye on them to achieve that perfect golden brown hue. This is the time when your kitchen will start smelling delightfully sweet!
Total time
All in all, you’re looking at roughly 25-30 minutes from start to finish. Not bad for a batch of delicious, melt-in-your-mouth treats! Plus, with the ease of the recipe, you can whip these up anytime you need a sweet pick-me-up or dessert for guests. For more tips and ideas on variations, check out this helpful baking guide. Happy baking!
Nutritional facts for Sweetened Condensed Milk Snowballs
When it comes to indulging in sweetened condensed milk snowballs, knowing their nutritional content can help balance enjoyment and health. Here’s a quick breakdown:
Calories
Each delectable snowball contains approximately 120 calories. While they are a tasty treat, it’s wise to enjoy them in moderation as part of a balanced diet.
Sugar Content
These snowballs are sweetened with condensed milk, contributing about 16 grams of sugar per serving. It’s important to keep this in mind, especially for those monitoring their sugar intake or looking for alternative sweets.
Fat Content
With about 5 grams of fat, sweetened condensed milk snowballs offer a rich, creamy flavor that’s hard to resist. Most of this comes from the condensed milk itself, so they can be a delightful yet indulgent addition to your dessert lineup.
For more information on managing sugar and fat in your diet, consider visiting Healthline or WebMD. These resources offer great tips on maintaining a balanced lifestyle while enjoying treats like these!
FAQs about Sweetened Condensed Milk Snowballs
Can I use unsweetened condensed milk?
Using unsweetened condensed milk in your sweetened condensed milk snowballs isn’t ideal. The sweetness and texture of the sweetened variety are crucial for achieving that dreamy, melt-in-your-mouth experience. If you must substitute, consider adding sugar or another sweetener to your unsweetened version, but be mindful that it may alter the recipe. For more guidance on sweeteners, check out this article on alternative sweetening options.
How do I store leftover snowballs?
To keep your sweetened condensed milk snowballs fresh and delicious, store them in an airtight container at room temperature for up to three days. If you live in a warmer climate, you might want to pop them in the fridge to avoid any melting. Always let them cool completely before storing to maintain that perfect texture!
Are these cookies freezer-friendly?
Absolutely! Sweetened condensed milk snowballs freeze beautifully. Just layer them between sheets of parchment paper in a freezer-safe container. When you’re ready to indulge, let them thaw at room temperature for about 30 minutes, and they’ll taste just as delightful as the day you made them. Freezing is a fantastic way to keep your treats ready for spontaneous gatherings or midnight cravings!
With these tips, you’ll have all the info you need to make and enjoy your sweetened condensed milk snowballs without a hitch. If you have any more questions or tips to share, feel free to comment below!
Conclusion on Sweetened Condensed Milk Snowballs
Recap of Why You’ll Love Making These Cookies
In summary, sweetened condensed milk snowballs are a delightful treat that you’ll love making and sharing. They are incredibly easy to whip up, requiring just a handful of ingredients and minimal prep time. With their melt-in-your-mouth texture and a hint of sweetness, these cookies are perfect for any occasion, whether it’s a cozy night in or a festive gathering.
Imagine yourself indulging in these delectable bites with a cup of coffee or sharing them with friends. They’re sure to impress and become a staple in your cookie repertoire. So why wait? Get your kitchen ready and enjoy the creamy goodness of sweetened condensed milk snowballs. For more tips on cookie variations, check out this comprehensive guide. Happy baking!
PrintSweetened Condensed Milk Snowballs: Easy Irresistible Treats
These Sweetened Condensed Milk Snowballs are the perfect combination of sweetness and creaminess, making them an irresistible treat for any occasion.
- Prep Time: 15 minutes
- Total Time: 45 minutes
- Yield: 24 servings 1x
- Category: Desserts
- Method: No-Bake
- Cuisine: American
- Diet: Vegetarian
Ingredients
- 1 can sweetened condensed milk
- 2 cups shredded coconut
- 1 teaspoon vanilla extract
- 1 cup powdered sugar
- 1/2 cup chopped nuts (optional)
Instructions
- In a large bowl, mix the sweetened condensed milk and vanilla extract.
- Add the shredded coconut and powdered sugar, stirring until well combined.
- If using, fold in the chopped nuts.
- Shape the mixture into small balls and place them on a baking sheet.
- Chill in the refrigerator for at least 30 minutes.
- Roll the chilled balls in additional shredded coconut before serving.
Notes
- For extra flavor, consider adding a pinch of salt to the mixture.
- These treats can be stored in an airtight container in the refrigerator for up to a week.
Nutrition
- Serving Size: 1 snowball
- Calories: 150
- Sugar: 12g
- Sodium: 30mg
- Fat: 9g
- Saturated Fat: 7g
- Unsaturated Fat: 2g
- Trans Fat: 0g
- Carbohydrates: 18g
- Fiber: 1g
- Protein: 2g
- Cholesterol: 5mg
Keywords: sweetened condensed milk, snowballs, treats, dessert